Sunday, July 13, 2014

July WIPocalypse Check-In


Well, somehow I missed checking in last month.  I just lost track of things and by the time I remembered, it was pretty late to be doing a post. But that means I have some progress to show this month!


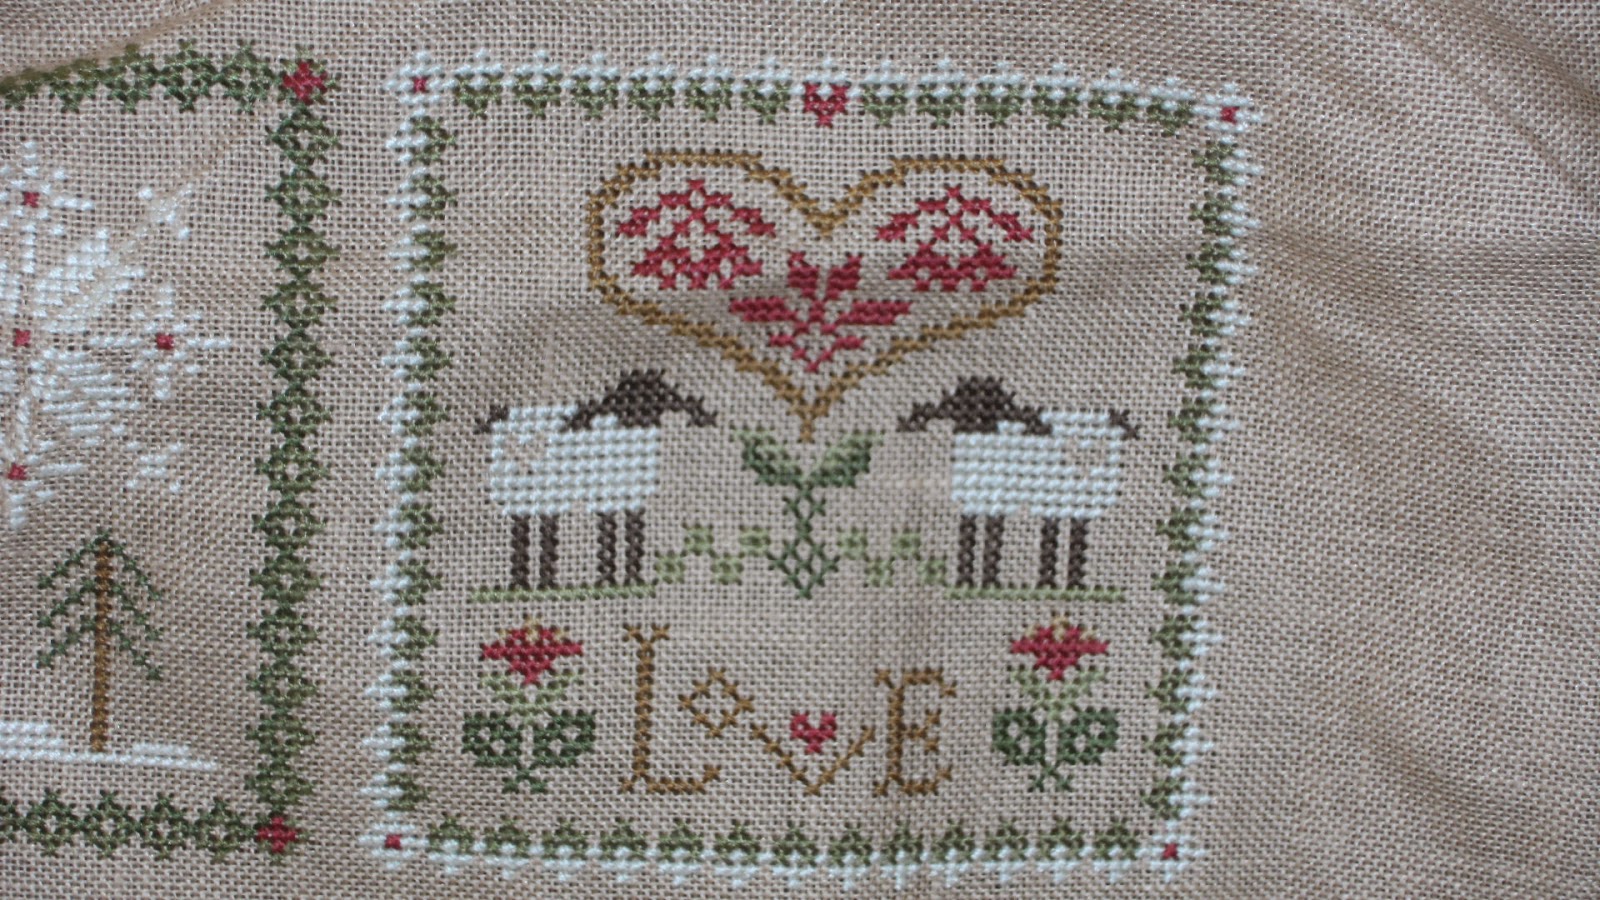
 First, I have been stitching like a mad woman on my anniversary sampler.  This is by Ellen Maurer-Stroh, done on 32 ct. light mocha Belfast linen.  It dawned on me awhile ago that I really didn't have THAT much time to get this baby done, so I put my foot on the gas.  As you can see from the picture above, it is quite close to being completed.  I had a goal of having it done by July 15, so that I could get it framed in time for our actual anniversary in August, but since the 15th is just a few days away, that may not happen.  But, I can't see needing more than another week to get it done, so I'm happy about that.  Hopefully, next month I'll be showing you the framed, completed piece.  I do love the design.  Those old-fashioned roses just make me smile!


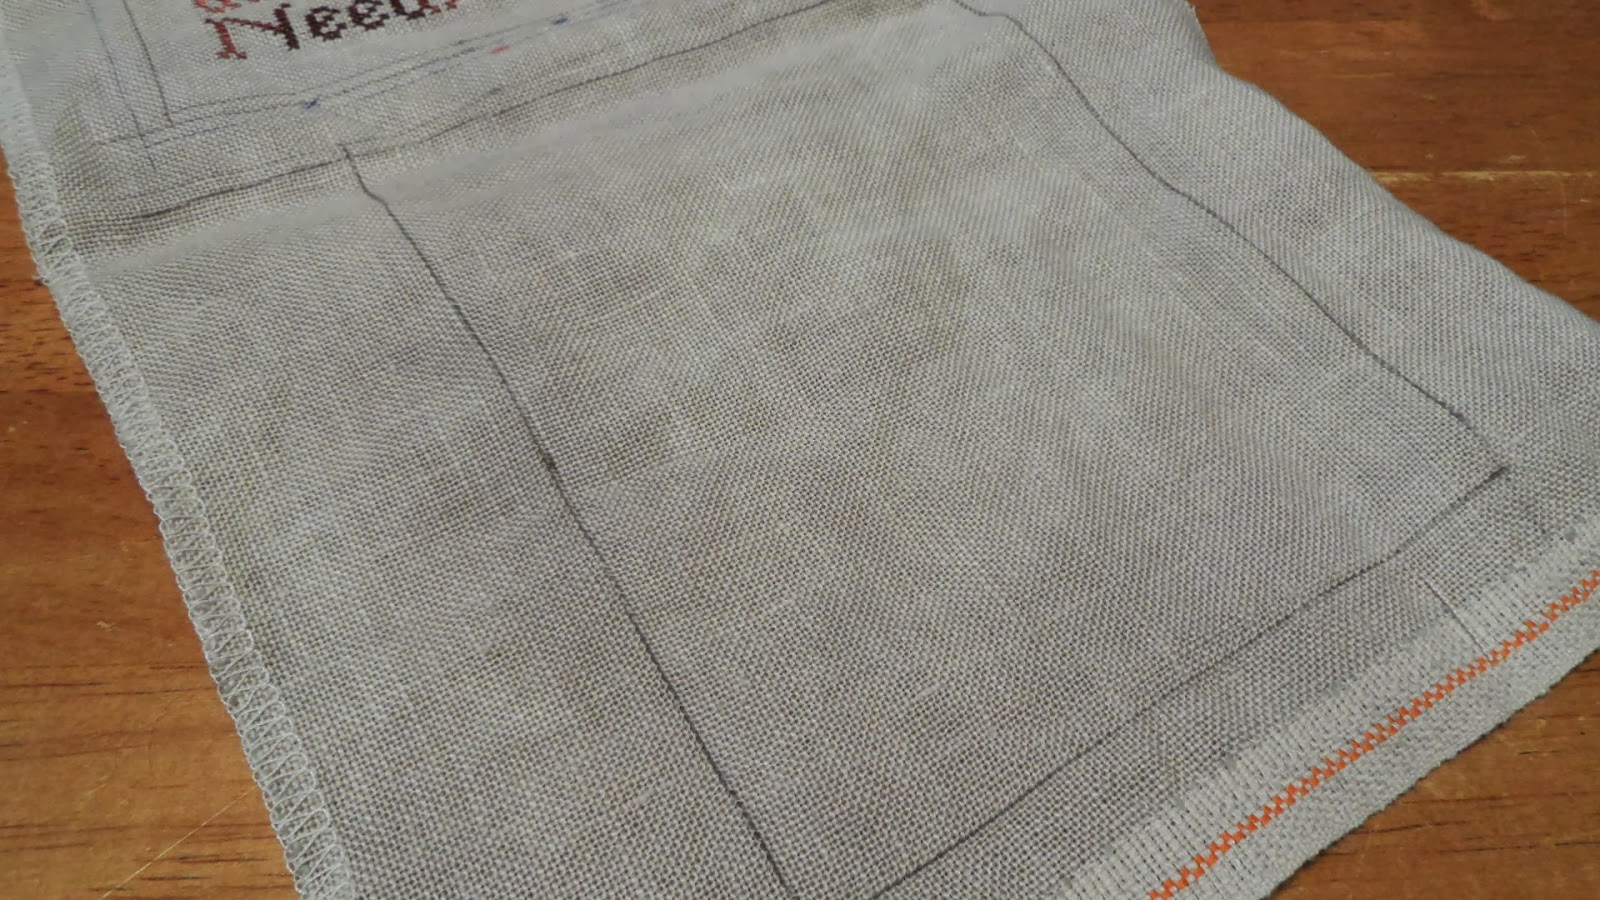
And secondly, I have a new start.  My sister and her husband bought a vacation condo on the beach in Galveston, Texas a couple of years ago, and I wanted to stitch a decor item for the condo.  I'd looked at a few beachy-type pieces, but when I saw this seashell wreath, I knew it was perfect.  Unfortunately, the design is only available as a kit, but fortunately, it was pretty inexpensive on Amazon.  Anyway, I managed to work on the wreath for a few days here and there, and the photo below shows how far I've gotten.  Can I just tell you how much I LOVE the colors in this thing?  The softest golds and tans and lavenders and greys.  Yummy.  The design is by Nancy Rossi, one of my all-time favorite designers, and I'm using 3 strands of floss on white Aida 14.


Finally, this month's topic is Christmas or holiday stitching, and when we start.  If I'm doing Christmas projects, yes, I would start now or even have started earlier.  But, I'm not planning on doing anything big as far as gifts this year.  At most, I'll stitch a few ornaments, so I'm not terribly worried about getting started.  I'm much more worried about getting that anniversary piece finished!

Til August, happy stitching everyone!  Can't wait to check everyone's progress on their pieces!

Saturday, May 17, 2014

WIPocalypse May Check-In


Greetings, fellow stitchers!  Can you believe that it's May already?  So wonderful to be having longer days and warmer weather.  Unfortunately, I did not stitch as much this past month as I would have liked to.  I went to Texas for a week toward the end of April, and I frankly expected to be able to have some down time for stitching.  But, it just didn't work out that way and I barely stitched at all that whole week.  Add in a few busy weeks with my hubby having a medical procedure and moving my older son out of his apartment at college, and you have the makings for a slim month of cross-stitch.

Still, I made a LITTLE progress on most of my projects.  First, this is the AAN stylized tree design that I have been working on:
I

I'm happy with how this one is coming along.  I love the colors, and it's an easy stitch (nice, easily definable blocks of color) for those nights when I'm tired.

Next, I got one more sheep finished on my Little Sheep Virtues -- this one is March, and the virtue is Peace:


Although I have not kept up with my loose goal of doing one sheep per month, I'm still glad to have finished Peace.  The little sheep in this one has the cutest wreath of leaves of leaves and flowers around his woolly neck!!  Here is how the whole piece looks so far:


Finally, Tyler's Lion.  This is the HUGE sampler by My Big Toe where the motifs are based on ones used in the weaving industry in the 1800's.  I haven't worked a ton on this piece lately, but I've almost got the huge center house and trees motif finished.  This sampler does not have a lot of backstitching, but backstitches connect all of those little leaves to the trees, so I need to finish that on the right-hand tree, plus finish that bit of fence at the bottom.


Well, that's it for my progress this past month.  Hopefully, I'll have more to show in June.

Now for this month's question.  Measi has asked:  What designs or themes do you really wish you could find?  What do you think is missing among stitching designs?

Hmmmm.  Well, in general, I have no complaint about the number and variety of cross-stitch designs out there!  It is crazy how much is available these days!  But, it just so happens that twice in my stitching life, I have had occasion to look for a design for an anniversary sampler.  The first was years ago, when I wanted to stitch something to commemorate my parents' 40th wedding anniversary.  The second time was just recently, when I was looking for a design to stitch to celebrate an anniversary milestone of my own that is coming up later this summer.  Both times, I searched and searched and just did not find very many pleasing designs.  There are TONS of designs available for weddings, but not much specifically for anniversaries.

In fact, for the piece that I gave my parents, I ended up modifying a wedding sampler that I found in a magazine.  I loved the design, so I changed the words of the poem so that they were more fitting for an anniversary, and then I included my parents' names and the span of their marriage.  It came out great, but I did a lot of work modifying the design.

For my own anniversary, I think I've mentioned on a past post that I am using EMS's Anniversary Sampler.  I know, it's called an anniversary piece, right?  Yet, the actual design was charted as a BIRTH sampler.  No problem there, except that the alphabet provided, while beautiful, is too large to stitch two names in the heart.  But, I can use a different alphabet and that shouldn't be a problem.

Other than that, I think it might be nice to see more collegiate sports themed stuff.  I've seen a few motifs, but for a college kid or sports buff, it might be more practical to make stuff like towels or smaller pieces with the school's emblem or logo.  However, this design gap probably has more to do with the cost of licensing those kinds of designs than anything else.

Well, that's it for me for May!  Have a great stitching month!


Tuesday, April 15, 2014

WIPocalypse April Check-In


Greetings, fellow stitchers!  Hard to believe that it's time already for the April WIPocalypse update!  But April means spring time, and that is definitely a good thing.  So, first things first -- my progress for the past month on WIPS.

I did not work at all last month on Tyler's Lion, my historical sampler.  No reason, I just got sidetracked by other things.  Such as my new start.  I loved the finished Albero Felice so much that I decided to start what will be a companion piece by the same designer, Alessandra Adelaide (AAN).  She has a couple dozen fantastic, stylized tree designs, and I fell in love with this one:


I chose this one for the design, but also because some of the colors are the same ones used in Albero Felice.  Since I plan to frame them similarly and hang them as companion pieces, I figured the similar colors would tie the pieces together.  Anyway, here is my start on this one, which I'm stitching on 32 ct. antique white Belfast linen:


I actually could have worked a lot more on this one, but one of the reasons that I started it is that I am going to Dallas to see my sister in a week or so, and I wanted a piece to take with me that wasn't super small like an ornament, but that was simple enough that I could work on it without having to intensely concentrate on each stitch.

Next up is Liza's Bouquet.  This piece was my primary focus for the month.  I'm not sure why, I just couldn't seem to stop working on it!  I just love stitching this design, it is so bright and colorful.  So here is where I am on this one as of yesterday:


And here's a close up of one of the super colorful areas:


Ok, so that's my stitching progress for the month.  April's discussion topic is how do we organize our stash?  Hmmm.  This one is kind of tough for me.  I have two stashes.  The reason is that I took a multi-year hiatus from stitching when my arthritis got bad, and I've only returned to this hobby in the last year.  So I have stash from "before," which is mostly still packed away in boxes in the basement, and then I have "current" stash, which is a few patterns and fabrics that I've purchased lately.  And I really have not organized my "new" stash at all!  I have some projects put together and they are in a basket below my stitching table, but other than that, things are in disarray.  I do have all of my floss organized on bobbins in the plastic boxes, so at least I can easily find threads that I need.   I'll be anxious to read everyone else's updates and see all of your organizational tips -- maybe I can work some magic on all of my stash!

Until May, then, happy stitching! 

Friday, April 11, 2014

DIY Puzzles


Here is a great idea for a party activity, or a fun twist on a greeting card -- do-it-yourself puzzles.  Did you know that you can buy blank puzzles that you can decorate yourself?  Yep, you can, and you can even get them in various sizes.  You can find these in some party stores, but you can also buy them on Amazon.  That's where I got the ones I recently made.

At my office, we celebrate Pi Day (see this post if you want more information), and I'm usually in charge of the activities.  I needed something that would be fun and that wouldn't take too long.  I decided to make puzzles stamped with random numbers, to be put together by teams of two.  This was a contest, so the first team to finish their puzzle won a prize.  Because these were adults, I chose puzzles roughly 81/2 x 11 in size, with 63 pieces in each. But, as I said, you can buy the blanks smaller or larger, and with more or fewer pieces.  For instance, you might want small puzzles with just a few large pieces to put in goody bags for a kid's birthday party.

You can decorate the blanks any way you choose.  They can be painted, stamped, or colored with markers, colored pencils, crayons, or pretty much anything else you can think of.  For mine, I left the background white (I actually wish now that I had painted the background a color first -- the puzzles would have been more attractive).  Then I got out various number stamp sets I own, along with a few different colors of ink pads.  I needed my puzzles to be all the same, so I set up the blanks on my kitchen table and stamped them assembly line fashion.  Here's a picture of the puzzles in process:


And here is a close-up of one of the puzzles -- you can see where the pieces will eventually snap apart:


I should mention that the one thing you can't do with these puzzles is run them through a printer -- the blanks are made of thin cardboard material, NOT cardstock.  Because they are cardboard, they are pretty much like a "real" puzzle that you would buy, just a little thinner.  And the pieces come apart pretty easily when you are done decorating.

I just packaged mine in plastic bags to tote to my office, but you could do a cuter presentation, as well.  If the puzzle is to be a greeting card, you could slip the pieces in an envelope or small box.  The possibilities are endless.

Cost:  For the size that I bought, the blank puzzles ran a little less than a dollar each, but I did have to buy a dozen.  You may be able to buy blanks individually at a party store.

Sunday, March 16, 2014

WIPocalypse March Update!

Greeting fellow stitchers!  Wow, hard to believe it's time for the March WIPocalypse update already!  This last month has gone fast, but I've gotten quite a bit of stitching done.  It's still cold and snowy where I am, and that helps.

First, I have a finish!  This is Albero Felice, by AAN.  I stitched it on antique white 32 ct. Belfast linen.  I just love how this came out.  In fact, I like it so much that I bought the pattern to stitch a companion piece.  I thought they'd look great framed together.  I have the fabric and floss for the companion piece, too, so maybe I'll start on that in the coming month.


Next is a new start.  I mentioned last month that I have a milestone anniversary coming up this summer, so I decided to do a commemorative anniversary piece.  This is what I chose -- it's by Ellen Mauer Stroh.  I love the lacy look of the winter white border and, looking at the floss that I've gathered,  the colors in the roses are just gorgeous! 


Here is my start on it:


I'm doing it on light mocha linen, and I like the subtle contrast of the border thread color.  One problem with this project, though -- the symbols on the chart don't match the floss key AT ALL.  It's like they decided after printing the key to use completely different symbols.  The shop I bought the pattern at is awaiting word from the designer on this (I found nothing about the issue online), but I was able to start anyway since it was pretty obvious what the border color was supposed to be!

Next up is Tyler's Lion, my huge historical sampler.  It is really hard to get the whole thing in a picture, so I photographed just the part that I worked on this past month, which is that huge center house and trees motif.  I just need to finish that fence on the right side and that motif will be done.

Finally, since finishing Albero Felice, I pulled out Liza's Bouquet and I have been working on that for the past couple of weeks.  Here is my progress :


I LOVE working on this piece, because it is so colorful and fun that it just cheers me up to work on it.  As you can see, though, it's a fairly complicated and dense design, so it's one that I have concentrate on.  This design is by Ginger & Spice, and I'm stitching it on 14 ct. white Aida using 3 strands of floss because I wanted really full coverage.  I have been working on this particular flower the last couple of days, so thought I'd show a close-up:


Isn't that flower the most beautiful thing?  It just comes alive under my needle.

Well, that's the progress on the projects I worked on this past month.  As the March discussion topic, Measi suggested that we talk about our "stitching spot" and include a photo.  Well, here's mine, excuse the mess:


 I stitch in a chair in the living room so that I can be with the family when possible.  You can't see it in this picture, but I have a floor light right by the chair, and I keep my current projects and paraphernalia on top of that table.  I've got a pair of reading glasses there, as well as pencils and highlighters, a pencil sharpener, my home phone as well as a little speaker-stand that holds my mobile phone, and the coaster is for my omnipresent cup of coffee.  I like to listen to classical music while I stitch, and I can plug my phone into that little speaker and enjoy my music.  I have a lot of my music in the Amazon Cloud Player -- love that thing!

The contraption on the chair arm is a combination pincushion and trash bag.  I love this thing.  I keep a bunch of needles in the pincushion and then there is a magnetic strip right there that holds my embroidery scissors.  Under the table is a biggish basket that holds other projects, a couple of floss boxes, and things I may need soon but that I'm not using at the moment.

Til April, then -- happy stitching!


Sunday, March 9, 2014

Magnetic Clip for Needlework


There was a thread recently on a message board that I frequent regarding using needle minders when you are cross stitching or doing other needlework.  I don't have a needle minder, but they are two-piece items with magnets on both parts so the minder (usually decorative) kind of "sticks to" your fabric.  The minder provides a safe place to park your needle while you are working, so that you aren't leaving stray needles in chair arms for another family member to accidentally find (not that I would know anything about that).

Well, I do not use a real needle minder, but I wanted to share what I do use, because it is effectively the same thing.  I use clips that are sold as food storage items -- you're supposed to use them to keep bags of chips closed, etc.  And I assure you, they are great for that.  BUT these clips also have strong round magnets on the back, because they are intended to stuck to the fridge for easy use while you're in the kitchen.  That magnet makes them PERFECT for needlework, too, because the magnet acts as a needle minder!

I bought the clips at my grocery store and they came in a set of 6, with multiple bright colors.  Here is a picture of the orange one, in use:


As you can see from both of the photos, I use a hoop when I cross stitch, and I roll up the extra fabric around my design and I simply clip it to the edge of the hoop with one of the magnetic clips.  I face the magnet part toward me, because then I can use it just like a needle minder -- as a super convenient place to park my needle while I answer the phone or grab another cup of coffee.  Because the clips are meant for kitchen use, they open up quite wide.  That's perfect, because I know that some people use hair clips to clip excess fabric onto their hoop, but a lot of hair clips just don't open up wide enough.  These clips do!

So, just wanted to share this little tidbit with my stitching friends.  I don't know exactly what brand these clips are, as I bought them some time ago and then "re-purposed" a few for my craft area.  But, I'm sure there are other, similar clips that would work fine.  The real point is just to recommend that if you're looking for clips to hold needlework, don't forget to check out the kitchen department.  You may just find the perfect clip and needle minder in one!!

P.S. Update on the fruit fly situation.  We are now on the THIRD dish of vinegar solution -- I leave the dish out for a few days and see what we get.  I got 25 or so fruit flies in the first few days, another 22 the second few days, and there are at least 10 more in the dish that is currently on the counter.  The moral of this story is, if you have a fruit fly problem like we did, there are probably A LOT MORE OF THEM in your house than you ever suspected!!  I plan to keep a dish of the vinegar solution out until we have no dead fruit flies after 48 hours.  And yeah, it's still really gross.


Friday, February 28, 2014

Fruit Fly Trap

Sorry for the rather gross photo!  But -- have you ever had a fruit fly infestation?  We get them occasionally in the summer, but we've had a bad one over the past few weeks, despite the fact that it's WINTER and I don't have any fruit or other produce sitting out in my kitchen!  So this post is really just a quick tip about what to do if you find your self in the same boat that I was in.

The first thing is to find the source of the infestation.  You might think there isn't anything, but there is.  In our case, my son apparently threw away a banana peel in his bathroom wastebasket two weeks or so ago.  (He's supposed to empty that wastebasket, too -- yeah, didn't get done.)  So we got rid of the banana peel, but we still had fruit flies in the house.

To get rid of them, I filled a shallow container about a third full with apple cider vinegar.  To that I added a few drops of dishwashing liquid.  Then I covered the container very tightly with plastic wrap, and poked some holes in the top.  The holes need to be big enough for the fruit flies to find, so they can't be too small.  Then I set the container out on the counter.

Twenty-four hours later, there were 22 dead fruit flies in the vinegar, and I'd killed 3 more that were hanging around nearby and were apparently drugged by the scent.  Now, if you'd asked me how many fruit flies I thought there were in the house after the banana peel had been tossed, I'd have said 3 or 4.  I had NO IDEA we had this many!  Gross, just gross.  And yeah, it's really gross seeing their dead bodies in that container.  But, it had to be done.

After twenty-four hours, I tossed the old mixture and set out a new container.  You have to keep a dish of the mixture out for a few days to make sure you catch any fruit flies that have just hatched.  I'd have sworn there weren't any more of those suckers in the house, but after a few hours, there were 3 flies in the solution.

Again, sorry for the gross picture, but I wanted to show you that this fruit fly trap really works!  Apparently, fruit flies are really dumb, and after they fly into the container through one of the holes, they can't figure out how to get back out again, and eventually they drown.  So, yeah, very gross, but very effective.  Just a quick tip from my kitchen to yours!   

Tuesday, February 18, 2014

WIPocalypse 2014: February Report


It's the middle(ish) of February, so that means it's time for a monthly report on the progress I've made on the various cross-stitch projects that I've committed to working on this year.  I've been stitching quite a bit lately, and have made pretty good progress on some of my WIPs.  First up is Tyler's Lion, my huge, historically-based, one-color sampler.  This was designed by Long Dog Samplers.  I've gotten the entire border down the left side completed, and I decided to start on the large center panel next.  This is my favorite thing to stitch on while watching TV.          


Next is Albero Felice, an AAN design.  The name translates from Italian as "Happy Tree," and I can't tell you how much I love this piece!  I love the design, the cheery colors, the wonderful curliques -- all of it.  I love this pattern so much that I've been looking through all of AAN's tree designs (and there are a TON of them) and I've found one that I may stitch at a later point as a sort of companion piece to this one.


Next is Little House Needlework's Little Sheep Virtues 12-part series.  I decided to stitch these all on one piece of fabric, and my goal is to do one each month.  I've completed the first two virtues, with February's "Love" shown below.


One project I haven't worked on yet this year is Mirabilia's Spring Queen.  Below is my most recent progress photo on this one.  She is all finished except for the metallic thread stitches, and the beading.  I just haven't been in the mood to start those beads, but I'm sure I'll get back to this pretty lady soon!


Measi suggested that for this month, we talk about how many projects we like to keep going.  It's funny.  I used to be a strict one-at-a-time stitcher, but now I enjoy having several projects going at the same time.  I don't do any sort of formal "rotation," but sometimes I just don't feel like working on a certain project, so I'll take something else out of the basket.  I've found that my interest in all of my projects stays pretty high when I have several going at one time.

Also, I think I may have to change my proposed WIP list for this year.  I realized the other day that I have a milestone wedding anniversary coming up in August.  I am thinking of stitching an anniversary sampler to commemorate the occasion.  While it wouldn't really be "for" my husband (i.e., not really a gift), I know he would love it.  I have my eye on a beautiful design, and if I decide to buy the pattern and start on it, I'll post the update here.

In the meantime, happy stitching!! 

Friday, February 14, 2014

Ham and Navy Bean Soup (Slow Cooker Sunday)


I've mentioned on this blog before that Sunday is my favorite day of the week to use my slow cooker.  I love getting up in the morning, getting a hearty soup or stew started in the slow cooker, and then not having to think about dinner until it's time to toss some biscuits into the oven.  I use my slow cooker during the week sometimes too, of course, but something about using it on a weekend day gives me a delicious sense of freedom.  So much so that I make it a point to use the slow cooker on Sunday -- hence the subtitle of this post.

Today I'm featuring a hearty and delicious Ham and Navy Bean Soup.  It's easy, has a wonderful flavor, is reasonably healthy (I mean, the soup has ham in it, no getting around that), and very economical.  It also tastes great left over, so no problem making a BIG batch!

Before I start, though, I have to share a funny tidbit.  Many years ago, I bought a great little cookbook (before the internet, when people bought cookbooks) that featured bread and soup recipes.  There was a recipe in there for navy bean soup that I made several times, and the other soup recipes in the book were good, too.  But what I will never forget is the illustration accompanying the recipe for navy bean soup.  It featured a simply-drawn bean-shaped figure wearing a sailor's cap and saluting.  So, now, all these years later, I still can't make navy bean soup without thinking of that little enlisted bean saluting me.

My current recipe for ham and navy bean soup is actually a combination of a few different recipes, including one that claims to be one of the soups they serve in the cafeteria of the U.S. Senate.  In any case, I found that taking a little from each of the recipes produced a really great soup.  So, let's get started.


Armour Cure 81 is a great ham to use for soup.  It has a nice smoky flavor, without being too salty.  And have you ever noticed that some hams don't really have much ham flavor?  This one does.  I like to buy the spiral-sliced type so I have a bone to use for a later pot of soup.  And, of course, you don't have to buy a ham JUST for this recipe.  I usually make the ham for dinner (Easter, anyone?) and then freeze portions of the leftovers to use in soups.

The first step is to par-boil the navy beans.  You could soak them overnight, but I've found par-boiling them is much faster and produces perfect result.  All that par-boiling means is that you're going to pre-cook the beans a little bit before putting them into the pot.  This recipe calls for 1 lb. of dried navy beans to be boiled for about 10 minutes, then drained and rinsed.

After tossing the par-boiled beans in a large slow cooker (mine is 6 qt.), chop up and add in the ham, carrots, onions, and celery.  Add one of the big (about 32 oz.) paper containers of chicken broth or chicken stock.  Then add in the herbs and spices:


A quick word about those.  It might seem odd to put sage in the soup, since most people use it about once a year, in their Thanksgiving stuffing.  But, although it's known for going well with poultry, sage adds a perfect note to this soup.  So even if you're thinking "what the heck?" go ahead and add it in.  Here's what your pot will look like with everything in it, ready to be stirred up:


c

Cook the soup all day, but at least 9 hours.  I usually start the cooking time with an hour or two using the "high" setting, and then I turn it down to "low" until the soup is done.  Sometimes if I don't do this, the beans will be a little bit hard, and I've found that a couple of hours on "high" ensures that they'll be done to my liking.  One really important note:  the soup does not call for salt because of the salty ham and the salt in the chicken broth.  However, if you need to add in some salt, do NOT add it in until AFTER the soup is finished cooking, as it will inhibit the beans from getting as soft as they should.  And, the same is true for the tomato puree -- you want to add it in at the END only, or the soup won't come out right.  Here's what the pot should look like after the cooking time, but before you've added in the tomatoes (which, by the way, just give a mice touch of color and a little additional flavor to the soup):


Add in the tomatoes and let them heat through for just  few minutes, preferably while you slice a nice, warm baguette of crusty bread.  (Just a note -- biscuits or cornbread go great with this soup, too.)  Taste for seasonings, and then dish it up and enjoy!


Ham and Navy Bean Soup

1 lb. dried navy beans
32 oz. container chicken broth or stock
2 cups ham, cut into small cubes
4 medium carrots, peeled and sliced
2-3 stalks of celery, sliced
1 large onion, diced
1 tsp. dried sage
1 tsp. dried crushed thyme
1/4 tsp. crushed red pepper flakes
1/2 tsp. black pepper
1 can (about 14 oz.) pureed tomatoes (or tomato sauce)

In a large saucepan, bring the navy beans and about 6 cups water to a boil; boil for 10 minutes, then drain and rinse the beans.  Turn the beans into a large slow cooker, then add the carrots, celery, onion and ham.  Add the chicken broth to cover, then stir in the sage, thyme, red pepper and black pepper.  Cook on high for an hour or two, then turn setting to low and continue cooking until beans and vegetables are tender.  Add in tomato puree and taste to determine if additional salt and pepper are needed.  Allow tomatoes to heat through for a minute or two before serving.


Saturday, February 1, 2014

Tutorial: Lace-Trimmed Pincushion


A couple of months ago, I posted about the cute pincushion that I made for my sister for her birthday.  That's it in the photo above.  I liked the finished pincushion so much that I ended up making four more of them for Christmas gifts!  So, I decided I might as well show you all how to make them.  By the way, although I started off with a cross-stitched design, this same technique would work to make a small pincushion from most anything made out of fabric.  The design could be embroidered, sewn, painted, or it could be a quilt-block type design (pieced).  As long as you have a fabric front and back, you can make the design into a pincushion.

First draw two borders around your design, as I've shown below.  The outer border is going to be the cutting line, and the inner border will be the stitching line.  My design was intended to fill up the fabric, so I simply measured 1/2" from the outer edges of the stitching for the inner border, and then I added another 1/4" to get the outer border.  I marked the inner border with pencil and the outer border with pen.  If you are working with a small, centered design, just figure out the size that you want the finished pincushion to be.  That measurement will be your stitching line, then add the seam allowance to that to get your cutting line.


Next, on the piece of fabric that you want to use for the back, draw a rectangle that is the measurement of the cutting line. 

Cut out the two rectangles, then head to the ironing board. Cut two pieces of fusible interfacing a little larger than your fabric pieces.  Fuse the interfacing to the WRONG sides of your fabric.  (The purpose of the interfacing is to make sure the filler material stays inside the pincushion -- especially important if you're using a fabric like linen as I did.)  Trim the interfacing so it's even with the edges of the fabric pieces.


Next, place the front of the pincushion face up on a work surface.  Starting at the bottom center, pin lace or other trim into place, aligning the edge of the trim with the stitching line.  This is somewhat counter-intuitive, but the trim has to be pinned with the ruffled edge facing INWARD.  If your trim isn't pre-ruffled, add a long basting stitch along the edge of the trim with your sewing machine, and pull up the basting thread to gather the trim a bit as you go along.  As you go around the corners, add some extra gathers into the trim, so that it doesn't pull when the pincushion is turned right side out after it's sewn.  Overlap the trim a little as you come to the end.  FULL DISCLOSURE:  This step is the hardest part.  You have to gently force the trim to do what you want it to do.  Go slowly and pin carefully, especially at the corners.  Make sure the trim is right on that sewing line that you drew in earlier.  Use lots of pins.  


Once the trim is pinned in place, using a normal length straight stitch (not a basting stitch), machine sew right along the sewing line, being certain to catch the edge of the trim. 


Below is what the front of the pincushion should look like once the trim is stitched into position.


Now pin the front of the pincushion to the back, right sides together.  It's important to have the pincushion front ON TOP, so that you can see the stitching line where the trim was stitched down.


Starting in the middle of one of the long sides, machine stitch right along or just barely inside the trim stitching line, using a somewhat short stitch length.  Follow the line of stitching especially carefully at the corners.  Go all the way around the pincushion, stopping a couple of inches before you reach the beginning of your seam.  You need to leave an opening to turn the pincushion, and to fill it.  Here's the stitched pincushion, with the opening for turning.


Carefully turn the pincushion right side out.  This will take a bit of effort and coaxing.  Pull on the trim at the corners to be sure the corners are turned out the whole way.


Ground walnut shells make a great filling for your pincushion, and give it some weight.  You can get ground walnut shells at the pet store -- it's used as "litter" for lizards and some types of birds.  The bag I bought looked like this:


Scoop some of the filler into a shallow bowl, so that you have a nice big area to work over. 

Using a small spoon (a baby food spoon works great), fill the pincushion with the ground walnut shells through the opening that you left.  You want the pincushion to be fairly full, but not completely stuffed.


Once the pincushion is filled, carefully tuck the seam allowances in along the opening, and hand sew the edges of the opening closed, using very small stitches.  You can use a blanket stitch or any type of stitch that will overcast the edge. If you like, you can also tack the pieces of trim together along the bottom where they overlap (this is optional).

That's it -- your pincushion is finished, ready to give as a gift or to take its place next to your sewing machine.


I promise that once you've made one  of these pincushions, you'll want to make more, both because they're cute, and also because the ground walnut shells come in something like a 5 lb. bag.  (By the way, if  you know of another craft use for ground walnut shells, I'd love to know about it!)  Happy stitching!!