
To get the length right, have the person who will be wearing the sleep pants try them on. Take a couple of straight pins, fold the hem up, and mark the length that you want the pants to end up. If you're not sure how long they should be, a good rule of thumb for things like pj pants is that they should come just a bit above the floor at the back leg. If you mark them at this length, the wearer will have plenty of length over the foot. Remember, these pants won't shrink since we pre-washed our fabric. You don't have to mark the whole hem while the pants are on the wearer; just mark that back leg area.
Once you know where you want the final length of your sleep pants to be, you need to cut the bottoms of the legs off exactly 1" below your final length measurement. That 1" of fabric will be the hem. You can use your seam gauge to mark all around each leg (with pencil) where your cut line will be. That unfinished, cut edge will be enclosed in the hem, so it doesn't matter if you use something highly visible, like a red pencil, to mark your line. Perhaps you're wondering, though, why you need to cut the excess fabric off? Well, you could leave the length as is and make a deeper hem. But, unless you're making these for a child and you want to allow some extra length that you can let out in case they grow, I recommend cutting off the extra fabric. A small hem is easier to do and it's a more professional-looking finish.
So, once your legs have been cut, turn the pants inside out, use your seam gauge and turn up the hem to 1". Pin all the way around each leg, as shown below:


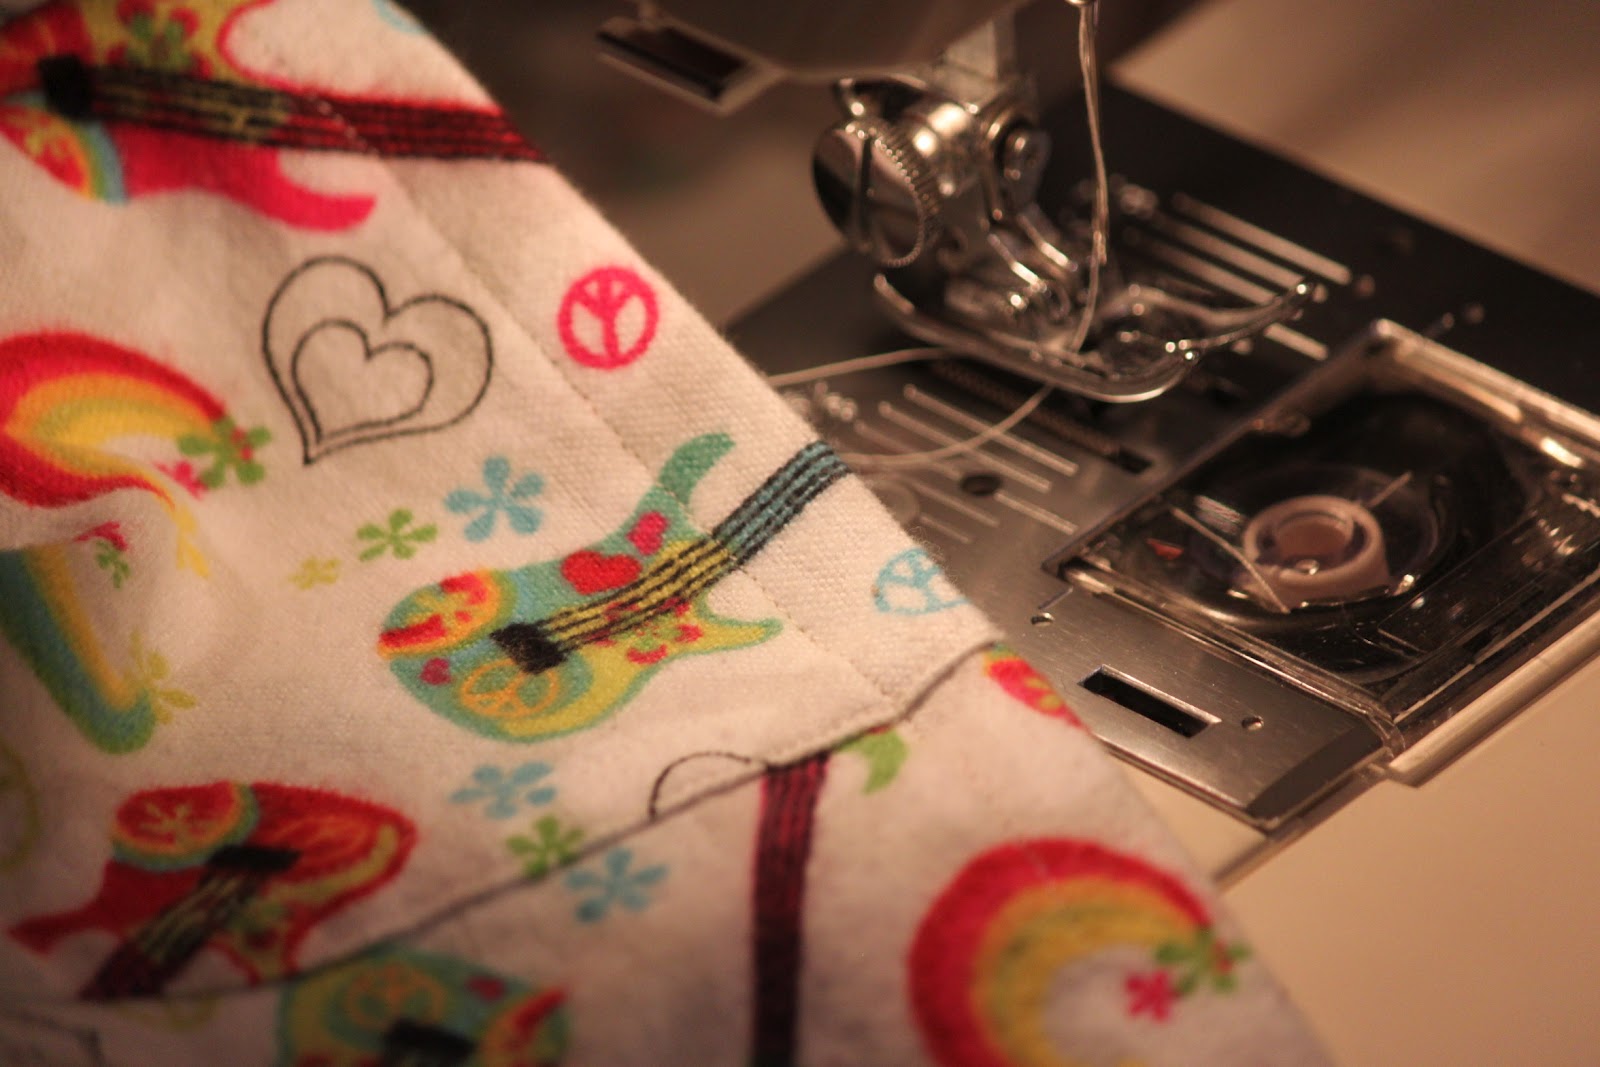
The photo below shows my pants, slipped over the free arm of my machine, as I'm starting to sew the hem. You want to start your sewing a few inches in front of the inner leg seam (which will be the French seam that we did). This is because you want the start and finish of the stitching for the hem to not be noticeable. Note in the photo below that I'm sewing pretty close to the folded hem edge, although you don't need to be right AT the edge like we were when stitching the elastic casing. The hems are more forgiving.

Go ahead and sew the hems in both pant legs, and trim all of your loose threads. Here's what the finished hems will look like on the outside ...


But seriously, aren't you proud of yourself? You made a comfortable, durable pair of pj pants that will wear like crazy, won't shrink, and can be washed and dried with no seams raveling or threads coming undone. You also (hopefully) learned a few new techniques in the process.
The NEXT sew-along project is going to be an apron, so start looking for some pretty, spring-like fabric to make yours, and I'll have an introductory post on that project soon!!


