Greeting fellow stitchers! Wow, hard to believe it's time for the March WIPocalypse update already! This last month has gone fast, but I've gotten quite a bit of stitching done. It's still cold and snowy where I am, and that helps.
First, I have a finish! This is Albero Felice, by AAN. I stitched it on antique white 32 ct. Belfast linen. I just love how this came out. In fact, I like it so much that I bought the pattern to stitch a companion piece. I thought they'd look great framed together. I have the fabric and floss for the companion piece, too, so maybe I'll start on that in the coming month.
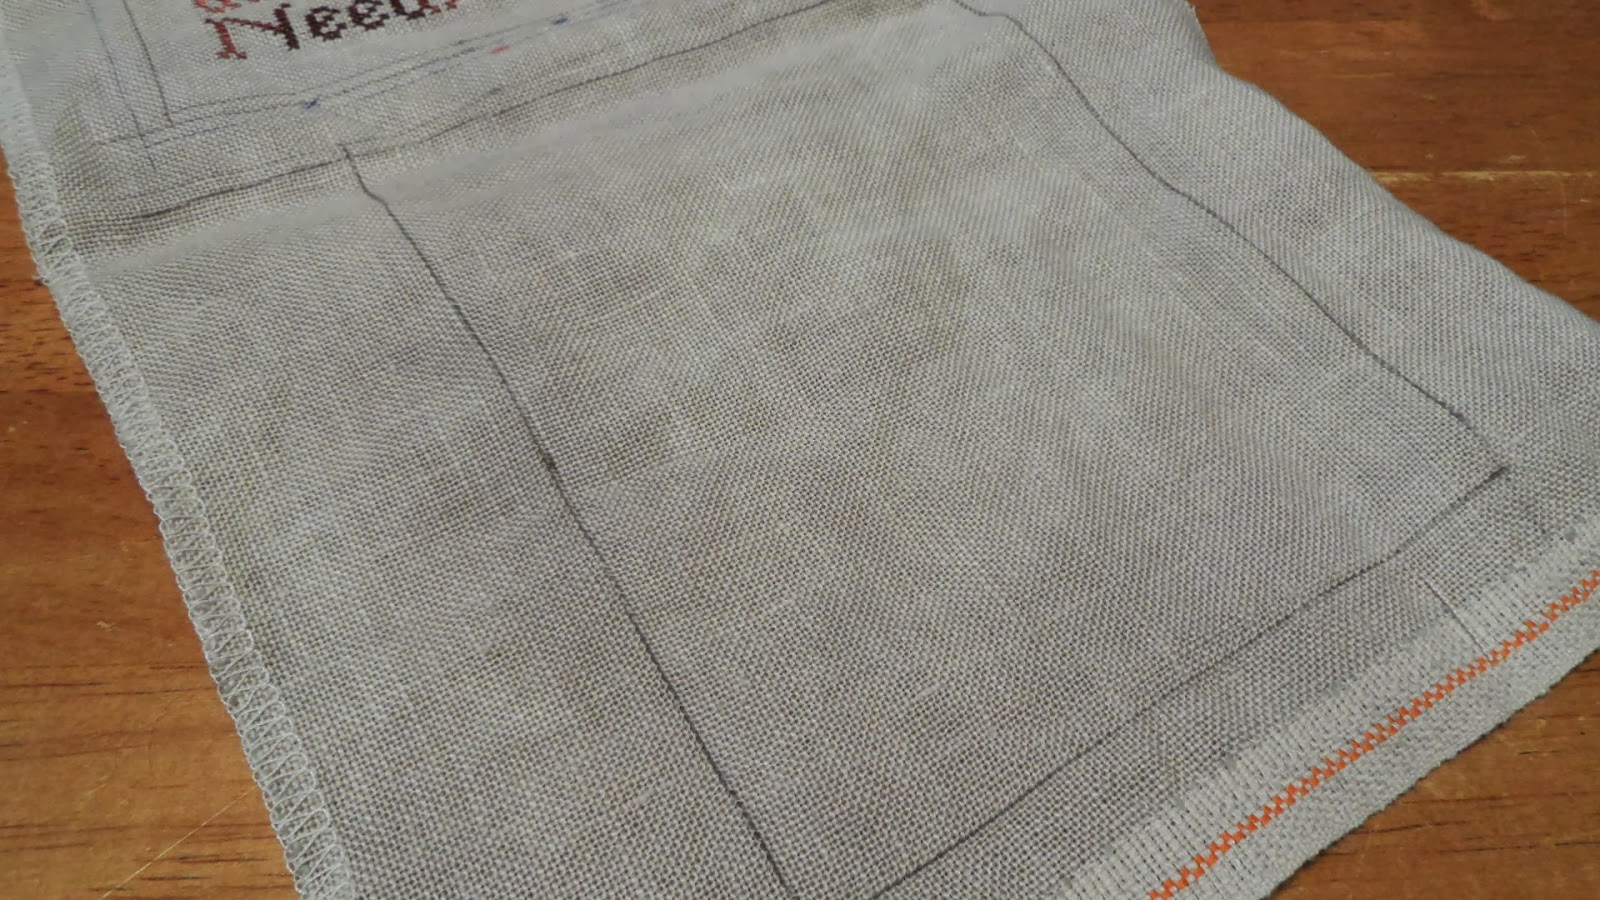
Next is a new start. I mentioned last month that I have a milestone anniversary coming up this summer, so I decided to do a commemorative anniversary piece. This is what I chose -- it's by Ellen Mauer Stroh. I love the lacy look of the winter white border and, looking at the floss that I've gathered, the colors in the roses are just gorgeous!
Here is my start on it:
I'm doing it on light mocha linen, and I like the subtle contrast of the border thread color. One problem with this project, though -- the symbols on the chart don't match the floss key AT ALL. It's like they decided after printing the key to use completely different symbols. The shop I bought the pattern at is awaiting word from the designer on this (I found nothing about the issue online), but I was able to start anyway since it was pretty obvious what the border color was supposed to be!
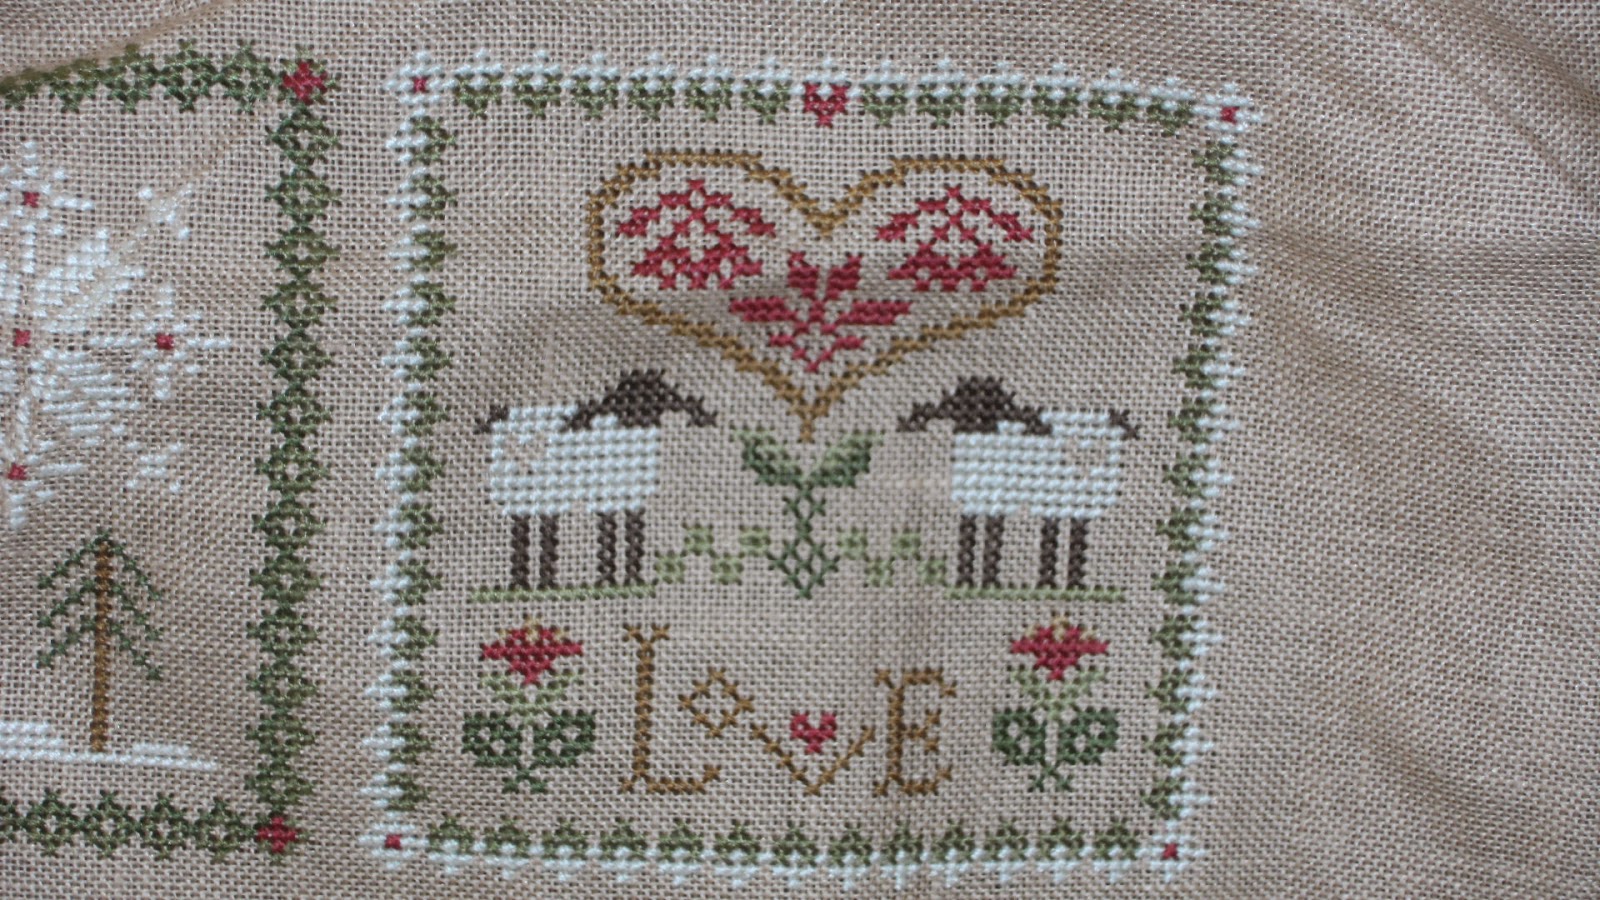
Next up is Tyler's Lion, my huge historical sampler. It is really hard to get the whole thing in a picture, so I photographed just the part that I worked on this past month, which is that huge center house and trees motif. I just need to finish that fence on the right side and that motif will be done.
Finally, since finishing Albero Felice, I pulled out Liza's Bouquet and I have been working on that for the past couple of weeks. Here is my progress :
I LOVE working on this piece, because it is so colorful and fun that it just cheers me up to work on it. As you can see, though, it's a fairly complicated and dense design, so it's one that I have concentrate on. This design is by Ginger & Spice, and I'm stitching it on 14 ct. white Aida using 3 strands of floss because I wanted really full coverage. I have been working on this particular flower the last couple of days, so thought I'd show a close-up:
Isn't that flower the most beautiful thing? It just comes alive under my needle.
Well, that's the progress on the projects I worked on this past month. As the March discussion topic, Measi suggested that we talk about our "stitching spot" and include a photo. Well, here's mine, excuse the mess:
I stitch in a chair in the living room so that I can be with the family when possible. You can't see it in this picture, but I have a floor light right by the chair, and I keep my current projects and paraphernalia on top of that table. I've got a pair of reading glasses there, as well as pencils and highlighters, a pencil sharpener, my home phone as well as a little speaker-stand that holds my mobile phone, and the coaster is for my omnipresent cup of coffee. I like to listen to classical music while I stitch, and I can plug my phone into that little speaker and enjoy my music. I have a lot of my music in the Amazon Cloud Player -- love that thing!
The contraption on the chair arm is a combination pincushion and trash bag. I love this thing. I keep a bunch of needles in the pincushion and then there is a magnetic strip right there that holds my embroidery scissors. Under the table is a biggish basket that holds other projects, a couple of floss boxes, and things I may need soon but that I'm not using at the moment.
Til April, then -- happy stitching!
Sunday, March 16, 2014
Sunday, March 9, 2014
Magnetic Clip for Needlework
There was a thread recently on a message board that I frequent regarding using needle minders when you are cross stitching or doing other needlework. I don't have a needle minder, but they are two-piece items with magnets on both parts so the minder (usually decorative) kind of "sticks to" your fabric. The minder provides a safe place to park your needle while you are working, so that you aren't leaving stray needles in chair arms for another family member to accidentally find (not that I would know anything about that).
Well, I do not use a real needle minder, but I wanted to share what I do use, because it is effectively the same thing. I use clips that are sold as food storage items -- you're supposed to use them to keep bags of chips closed, etc. And I assure you, they are great for that. BUT these clips also have strong round magnets on the back, because they are intended to stuck to the fridge for easy use while you're in the kitchen. That magnet makes them PERFECT for needlework, too, because the magnet acts as a needle minder!
I bought the clips at my grocery store and they came in a set of 6, with multiple bright colors. Here is a picture of the orange one, in use:
As you can see from both of the photos, I use a hoop when I cross stitch, and I roll up the extra fabric around my design and I simply clip it to the edge of the hoop with one of the magnetic clips. I face the magnet part toward me, because then I can use it just like a needle minder -- as a super convenient place to park my needle while I answer the phone or grab another cup of coffee. Because the clips are meant for kitchen use, they open up quite wide. That's perfect, because I know that some people use hair clips to clip excess fabric onto their hoop, but a lot of hair clips just don't open up wide enough. These clips do!
So, just wanted to share this little tidbit with my stitching friends. I don't know exactly what brand these clips are, as I bought them some time ago and then "re-purposed" a few for my craft area. But, I'm sure there are other, similar clips that would work fine. The real point is just to recommend that if you're looking for clips to hold needlework, don't forget to check out the kitchen department. You may just find the perfect clip and needle minder in one!!
P.S. Update on the fruit fly situation. We are now on the THIRD dish of vinegar solution -- I leave the dish out for a few days and see what we get. I got 25 or so fruit flies in the first few days, another 22 the second few days, and there are at least 10 more in the dish that is currently on the counter. The moral of this story is, if you have a fruit fly problem like we did, there are probably A LOT MORE OF THEM in your house than you ever suspected!! I plan to keep a dish of the vinegar solution out until we have no dead fruit flies after 48 hours. And yeah, it's still really gross.
Friday, February 28, 2014
Fruit Fly Trap
Sorry for the rather gross photo! But -- have you ever had a fruit fly infestation? We get them occasionally in the summer, but we've had a bad one over the past few weeks, despite the fact that it's WINTER and I don't have any fruit or other produce sitting out in my kitchen! So this post is really just a quick tip about what to do if you find your self in the same boat that I was in.
The first thing is to find the source of the infestation. You might think there isn't anything, but there is. In our case, my son apparently threw away a banana peel in his bathroom wastebasket two weeks or so ago. (He's supposed to empty that wastebasket, too -- yeah, didn't get done.) So we got rid of the banana peel, but we still had fruit flies in the house.
To get rid of them, I filled a shallow container about a third full with apple cider vinegar. To that I added a few drops of dishwashing liquid. Then I covered the container very tightly with plastic wrap, and poked some holes in the top. The holes need to be big enough for the fruit flies to find, so they can't be too small. Then I set the container out on the counter.
Twenty-four hours later, there were 22 dead fruit flies in the vinegar, and I'd killed 3 more that were hanging around nearby and were apparently drugged by the scent. Now, if you'd asked me how many fruit flies I thought there were in the house after the banana peel had been tossed, I'd have said 3 or 4. I had NO IDEA we had this many! Gross, just gross. And yeah, it's really gross seeing their dead bodies in that container. But, it had to be done.
After twenty-four hours, I tossed the old mixture and set out a new container. You have to keep a dish of the mixture out for a few days to make sure you catch any fruit flies that have just hatched. I'd have sworn there weren't any more of those suckers in the house, but after a few hours, there were 3 flies in the solution.
Again, sorry for the gross picture, but I wanted to show you that this fruit fly trap really works! Apparently, fruit flies are really dumb, and after they fly into the container through one of the holes, they can't figure out how to get back out again, and eventually they drown. So, yeah, very gross, but very effective. Just a quick tip from my kitchen to yours!
Tuesday, February 18, 2014
WIPocalypse 2014: February Report
It's the middle(ish) of February, so that means it's time for a monthly report on the progress I've made on the various cross-stitch projects that I've committed to working on this year. I've been stitching quite a bit lately, and have made pretty good progress on some of my WIPs. First up is Tyler's Lion, my huge, historically-based, one-color sampler. This was designed by Long Dog Samplers. I've gotten the entire border down the left side completed, and I decided to start on the large center panel next. This is my favorite thing to stitch on while watching TV.
Next is Albero Felice, an AAN design. The name translates from Italian as "Happy Tree," and I can't tell you how much I love this piece! I love the design, the cheery colors, the wonderful curliques -- all of it. I love this pattern so much that I've been looking through all of AAN's tree designs (and there are a TON of them) and I've found one that I may stitch at a later point as a sort of companion piece to this one.
Next is Little House Needlework's Little Sheep Virtues 12-part series. I decided to stitch these all on one piece of fabric, and my goal is to do one each month. I've completed the first two virtues, with February's "Love" shown below.
One project I haven't worked on yet this year is Mirabilia's Spring Queen. Below is my most recent progress photo on this one. She is all finished except for the metallic thread stitches, and the beading. I just haven't been in the mood to start those beads, but I'm sure I'll get back to this pretty lady soon!
Also, I think I may have to change my proposed WIP list for this year. I realized the other day that I have a milestone wedding anniversary coming up in August. I am thinking of stitching an anniversary sampler to commemorate the occasion. While it wouldn't really be "for" my husband (i.e., not really a gift), I know he would love it. I have my eye on a beautiful design, and if I decide to buy the pattern and start on it, I'll post the update here.
In the meantime, happy stitching!!
Friday, February 14, 2014
Ham and Navy Bean Soup (Slow Cooker Sunday)
I've mentioned on this blog before that Sunday is my favorite day of the week to use my slow cooker. I love getting up in the morning, getting a hearty soup or stew started in the slow cooker, and then not having to think about dinner until it's time to toss some biscuits into the oven. I use my slow cooker during the week sometimes too, of course, but something about using it on a weekend day gives me a delicious sense of freedom. So much so that I make it a point to use the slow cooker on Sunday -- hence the subtitle of this post.
Today I'm featuring a hearty and delicious Ham and Navy Bean Soup. It's easy, has a wonderful flavor, is reasonably healthy (I mean, the soup has ham in it, no getting around that), and very economical. It also tastes great left over, so no problem making a BIG batch!
Before I start, though, I have to share a funny tidbit. Many years ago, I bought a great little cookbook (before the internet, when people bought cookbooks) that featured bread and soup recipes. There was a recipe in there for navy bean soup that I made several times, and the other soup recipes in the book were good, too. But what I will never forget is the illustration accompanying the recipe for navy bean soup. It featured a simply-drawn bean-shaped figure wearing a sailor's cap and saluting. So, now, all these years later, I still can't make navy bean soup without thinking of that little enlisted bean saluting me.
My current recipe for ham and navy bean soup is actually a combination of a few different recipes, including one that claims to be one of the soups they serve in the cafeteria of the U.S. Senate. In any case, I found that taking a little from each of the recipes produced a really great soup. So, let's get started.
Armour Cure 81 is a great ham to use for soup. It has a nice smoky flavor, without being too salty. And have you ever noticed that some hams don't really have much ham flavor? This one does. I like to buy the spiral-sliced type so I have a bone to use for a later pot of soup. And, of course, you don't have to buy a ham JUST for this recipe. I usually make the ham for dinner (Easter, anyone?) and then freeze portions of the leftovers to use in soups.
The first step is to par-boil the navy beans. You could soak them overnight, but I've found par-boiling them is much faster and produces perfect result. All that par-boiling means is that you're going to pre-cook the beans a little bit before putting them into the pot. This recipe calls for 1 lb. of dried navy beans to be boiled for about 10 minutes, then drained and rinsed.
After tossing the par-boiled beans in a large slow cooker (mine is 6 qt.), chop up and add in the ham, carrots, onions, and celery. Add one of the big (about 32 oz.) paper containers of chicken broth or chicken stock. Then add in the herbs and spices:
A quick word about those. It might seem odd to put sage in the soup, since most people use it about once a year, in their Thanksgiving stuffing. But, although it's known for going well with poultry, sage adds a perfect note to this soup. So even if you're thinking "what the heck?" go ahead and add it in. Here's what your pot will look like with everything in it, ready to be stirred up:
Cook the soup all day, but at least 9 hours. I usually start the cooking time with an hour or two using the "high" setting, and then I turn it down to "low" until the soup is done. Sometimes if I don't do this, the beans will be a little bit hard, and I've found that a couple of hours on "high" ensures that they'll be done to my liking. One really important note: the soup does not call for salt because of the salty ham and the salt in the chicken broth. However, if you need to add in some salt, do NOT add it in until AFTER the soup is finished cooking, as it will inhibit the beans from getting as soft as they should. And, the same is true for the tomato puree -- you want to add it in at the END only, or the soup won't come out right. Here's what the pot should look like after the cooking time, but before you've added in the tomatoes (which, by the way, just give a mice touch of color and a little additional flavor to the soup):
Add in the tomatoes and let them heat through for just few minutes, preferably while you slice a nice, warm baguette of crusty bread. (Just a note -- biscuits or cornbread go great with this soup, too.) Taste for seasonings, and then dish it up and enjoy!
Ham and Navy Bean Soup
1 lb. dried navy beans
32 oz. container chicken broth or stock
2 cups ham, cut into small cubes
4 medium carrots, peeled and sliced
2-3 stalks of celery, sliced
1 large onion, diced
1 tsp. dried sage
1 tsp. dried crushed thyme
1/4 tsp. crushed red pepper flakes
1/2 tsp. black pepper
1 can (about 14 oz.) pureed tomatoes (or tomato sauce)
In a large saucepan, bring the navy beans and about 6 cups water to a boil; boil for 10 minutes, then drain and rinse the beans. Turn the beans into a large slow cooker, then add the carrots, celery, onion and ham. Add the chicken broth to cover, then stir in the sage, thyme, red pepper and black pepper. Cook on high for an hour or two, then turn setting to low and continue cooking until beans and vegetables are tender. Add in tomato puree and taste to determine if additional salt and pepper are needed. Allow tomatoes to heat through for a minute or two before serving.
Saturday, February 1, 2014
Tutorial: Lace-Trimmed Pincushion
First draw two borders around your design, as I've shown below. The outer border is going to be the cutting line, and the inner border will be the stitching line. My design was intended to fill up the fabric, so I simply measured 1/2" from the outer edges of the stitching for the inner border, and then I added another 1/4" to get the outer border. I marked the inner border with pencil and the outer border with pen. If you are working with a small, centered design, just figure out the size that you want the finished pincushion to be. That measurement will be your stitching line, then add the seam allowance to that to get your cutting line.
Next, on the piece of fabric that you want to use for the back, draw a rectangle that is the measurement of the cutting line.
Cut out the two rectangles, then head to the ironing board. Cut two pieces of fusible interfacing a little larger than your fabric pieces. Fuse the interfacing to the WRONG sides of your fabric. (The purpose of the interfacing is to make sure the filler material stays inside the pincushion -- especially important if you're using a fabric like linen as I did.) Trim the interfacing so it's even with the edges of the fabric pieces.
Next, place the front of the pincushion face up on a work surface. Starting at the bottom center, pin lace or other trim into place, aligning the edge of the trim with the stitching line. This is somewhat counter-intuitive, but the trim has to be pinned with the ruffled edge facing INWARD. If your trim isn't pre-ruffled, add a long basting stitch along the edge of the trim with your sewing machine, and pull up the basting thread to gather the trim a bit as you go along. As you go around the corners, add some extra gathers into the trim, so that it doesn't pull when the pincushion is turned right side out after it's sewn. Overlap the trim a little as you come to the end. FULL DISCLOSURE: This step is the hardest part. You have to gently force the trim to do what you want it to do. Go slowly and pin carefully, especially at the corners. Make sure the trim is right on that sewing line that you drew in earlier. Use lots of pins.
Once the trim is pinned in place, using a normal length straight stitch (not a basting stitch), machine sew right along the sewing line, being certain to catch the edge of the trim.
Below is what the front of the pincushion should look like once the trim is stitched into position.
Now pin the front of the pincushion to the back, right sides together. It's important to have the pincushion front ON TOP, so that you can see the stitching line where the trim was stitched down.
Starting in the middle of one of the long sides, machine stitch right along or just barely inside the trim stitching line, using a somewhat short stitch length. Follow the line of stitching especially carefully at the corners. Go all the way around the pincushion, stopping a couple of inches before you reach the beginning of your seam. You need to leave an opening to turn the pincushion, and to fill it. Here's the stitched pincushion, with the opening for turning.
Carefully turn the pincushion right side out. This will take a bit of effort and coaxing. Pull on the trim at the corners to be sure the corners are turned out the whole way.
Ground walnut shells make a great filling for your pincushion, and give it some weight. You can get ground walnut shells at the pet store -- it's used as "litter" for lizards and some types of birds. The bag I bought looked like this:
Scoop some of the filler into a shallow bowl, so that you have a nice big area to work over.
Using a small spoon (a baby food spoon works great), fill the pincushion with the ground walnut shells through the opening that you left. You want the pincushion to be fairly full, but not completely stuffed.
Once the pincushion is filled, carefully tuck the seam allowances in along the opening, and hand sew the edges of the opening closed, using very small stitches. You can use a blanket stitch or any type of stitch that will overcast the edge. If you like, you can also tack the pieces of trim together along the bottom where they overlap (this is optional).
That's it -- your pincushion is finished, ready to give as a gift or to take its place next to your sewing machine.
I promise that once you've made one of these pincushions, you'll want to make more, both because they're cute, and also because the ground walnut shells come in something like a 5 lb. bag. (By the way, if you know of another craft use for ground walnut shells, I'd love to know about it!) Happy stitching!!
Friday, January 24, 2014
GROW YOUR BLOG 2014 -- Welcome!!
Greetings, blog guests! Welcome to my tiny little corner of cyberspace. My name is Barb and I’ve been blogging since about 2009. My blog focuses on the multitude of hobbies and crafts that I’m interested in, including cross-stitching, sewing, quilting, scrapbooking, card-making, other paper crafts, and photography, as well as cooking and recipes. In general, I do NOT blog about my personal life or include personal photos in my posts. At the top of my blog, you’ll find tabs separating the recipe posts, as well as crafty tutorials and cross-stitch finishes. A "Gift Ideas" tab is in the works.
With respect to cooking and recipes, my focus is on things that taste good! Well, I guess there’s a little more to it than that. I work full-time outside of the home as an attorney (I work in tax policy), so I love recipes for quick and easy dinner entrees, and I especially love good recipes for the slow-cooker. Beyond that, I am always collecting recipes for interesting finger foods, appetizers, and desserts – these come in handy when I’m planning to make snacks for the big game, as well as those times I need to bring a treat into the office.
So that you can see what I’m all about, here’s an example of one of my crafty posts, a tutorial I posted awhile ago on how to make adorable painted plant pots. Polka Dot Flower Pots And here’s an example of a recipe post, showcasing a delicious and easy muffin recipe I discovered over the holidays: Cranberry Muffins Finally, here’s an example that will eventually appear on the “Gift Ideas” section of my blog – a recipe and cute presentation idea for an easy and budget-friendly spiced tea mix, perfect if you like to give just a little something to your co-workers at Christmas: Hot Spiced Tea Mix
If you like my blog, I’ve tried to make it easy to subscribe or follow. There is a subscription gadget to the left, as well as a separate gadget if you’d like to follow my blog by e-mail. I love following blogs by e-mail, as I’m more likely to take the time to click a link right from my in-box, especially if the title of an update post has really caught my eye.
So, welcome to my blog, and I sincerely hope that you’ll find something you like here. Please feel free to leave a comment to let me know what you think -- I would love to hear from you!
Thanks for visiting!
Barb
Friday, January 17, 2014
Caesar Salmon
We love salmon at my house, but it's pretty expensive, so we don't have it as often as we'd like. But, when it's on sale in the seafood case, I always take advantage! This is one of our favorite ways to enjoy salmon.
You only need three things for this entree, and they're shown in the picture above. You need a nice, big salmon fillet (I prefer fresh, but frozen and thawed salmon is fine, too), some Caesar salad dressing, and bread crumbs. Now, you can really "do your own thing" with these ingredients. If you want to use low-fat Caesar dressing, that's fine (but I wouldn't use the fat-free). If you want to use panko bread crumbs, or Italian bread crumbs, or if you want to make your own bread crumbs, great. It's all good. But the Caesar dressing is the key to this preparation. Caesar dressing is full of yummy flavors like garlic and pepper and Parmesan. So really, the dressing is doing all of the seasoning for you!
First, pre-heat your oven to 400 degrees. Place the salmon in a shallow baking pan (you can spray with cooking spray first, if you like). Then, spread some of the dressing right from the bottle onto that beautiful salmon fillet. How much? Well, that depends on how much salmon you have. I usually use about 1 to 2 tablespoons of dressing for a pound of salmon. But more or less is just fine. Oh, and you don't need to brush any oil or butter or anything else on the fillet first. The dressing has enough fat in it to keep the salmon moist. I don't even salt and pepper the fish, because I think the dressing provides enough of both, but if you want to add salt or pepper, this would be the time to do it.
The next step is to sprinkle some bread crumbs over the dressing-coated salmon. Again, use as much or as little as you like. Now, if you want the top of the salmon to be all brown and crunchy, you can combine your bread crumbs with a little melted butter and toss before sprinkling them over the fish. I actually prefer to do this, but my very weird children like it when I use just plan bread crumbs, right from the container, no added butter. (Yeah. Ever wonder if your kids are really yours? This is one of those times.)
So, that's it! Now all you do is pop the pan into the oven and bake for about 20 minutes or so, until the salmon flakes easily and is done all the way through.
I like to serve Caesar Salmon with either buttered noodles or some kind of rice, and a green vegetable or salad. Oh, and if you have any salmon left over, it is delicious for lunch the next day, chilled and flaked over top of (dare I say it?) a big Caesar salad (or any salad, really). Yum!!
Caesar Salmon
1 lb. salmon fillet (fresh or frozen and thawed)
2 T. (or more) Caesar salad dressing
3 T. (or more) plain or seasoned bread crumbs
2 tsp. melted butter (optional)
Preheat oven to 400 degrees. Place salmon in a shallow, greased baking pan. Brush with dressing. Combine bread crumbs with melted butter (if using) and sprinkle over top of salmon, or sprinkle with crumbs right from the package.
Place baking pan in center of oven and bake for about 20 minutes, until salmon is cooked through and flakes easily with a fork. Be careful not to overcook!
Sunday, January 12, 2014
Christmas (Cards) in January
I don't know about you, but every year, I plan to make all of my Christmas cards, and then somehow, I end up not doing it. But, you know, it's NOT just "somehow" -- there 's a definite reason for this yearly failure. I have plenty of supplies and plenty of ideas, but what I always run out of is time. You too, right?
The thing about Christmas for me is that, while I love the whole season, I'm always wary of losing some of that love if I start "doing" Christmas too early. Making someone something that will be Christmas gift (a rag quilt, for instance) is perfectly fine to do many months ahead, but doing something with an overtly Christmas theme, such as making cards, doesn't feel right until, say, after Thanksgiving. Kind of like decorating the house doesn't feel right 'til then.
Well, I'm going to try to abandon that mindset this year, because there simply isn't any way that I will ever be able to make even a small number of Christmas cards between Thanksgiving and Christmas. The only way it will work is if I start making those cards earlier than what "seems right."
So, in that vein, I've already started thinking about Christmas card designs for next Christmas! I like to make a couple of different versions of a basic design, so I started looking for a simple design that could be adapted in any number of ways, and came across a basic tree design made with different Christmas-y papers. It occurred to me that not only could this cute little tree could be made out of many different combinations of papers, but the resulting card could also be embellished in a number of different ways.
Above is the first card that I made. I used a little gold adhesive gemstone on the top of the tree, and the "joy" is a die cut I made using my Quickutz (yes, I still use mine!). I really love this combination of papers and colors, and the contrast of "joy" done in white.
I like how this one came out, too. Three different green papers for the body of the tree, and since the background was so simple, I figured I could get away with using a really busy print for the middle part of the tree. A star brad tops the tree, and the snowflakes were made using a Martha Stewart punch. (BTW, she has GORGEOUS snowflake punches!!) "Holiday" is a punch-out from some random set I had, but you could use most any type of sticker, or print out a greeting on the computer using a favorite font, too.
And here's the last version that I made. The tree is embellished with different sizes and colors of star brads, then I used one of the gemstones for the top of the tree.
I"m happy that I've at least gotten a start as to what I want to do for cards this coming year. I can't promise when I'll get around to actually making them, but I"m going to try to let go of that self-imposed "no activities 'til after Thanksgiving" restriction. So, I'd love to know -- which version of my card do YOU like best?
Monday, January 6, 2014
WIPocalype 2014 -- First Post!!
Although I don't make New Year's resolutions, I am definitely a goal-oriented person. And I am also the kind of person that likes to have goals with respect to hobbies. Not to stress myself out, or to make my hobbies into things that "have" to be done, but simply because, for me, goal-setting works. I get more done when I've thought about my goals, and written them down, than when I just "wing it.".
That's why WIPocalypse 2014 is perfect for me. I want to make sure I keep up with my overall goal of cross-stitching more in 2014, so WIPocalype will help me do that. I love the idea of checking in once a month with progress pictures, and being free to change my list of things I want to work on, or finish, in 2014.
So, without further ado, here is the list of cross-stitch projects that I intend to work on in 2014. Some of them are current WIPs, but some will be new starts.
1. Spring Queen by Mirabilia
2. Liza’s Bouquet by Ginger & Spice
3. Tyler’s Lion by Long Dog Samplers
4. Angel of the Morning by Lavender & Lace
5. Christmas Flourishes by Mirabilia
6. Apostle’s Creed by My Big Toe Designs
7. Afternoon Nap (Bucilla kit)
8. Seasonal Birds (Bucilla kit)
9. Albero Felice by Alessandra Adelaide
10. Little Sheep Virtues by Little House Needleworks
11. “My House” ornaments (Little House Needleworks) for Brandon and Brian
Spring Queen, Liza's Bouquet, and Tyler's Lion are all current WIPs. I have all of the supplies for Angel of the Morning, Christmas Flourishes, and Apostle's Creed, and I just ordered fabric and pattern for Albero Felice. For the Little Sheep Virtues, I want to stitch these all on one piece of fabric, so I've ordered the fabric and a couple of the patterns to get myself started. I have a mini-goal of stitching one of the Little Sheep patterns each month.
That feels really good to get that all written down. It is a very snowy and ice cold day here in Michigan, so I think I'm going to make myself a nice hot cup of coffee, and sit down and stitch!
Subscribe to:
Posts (Atom)